Why so many lines??
Simply so you will always have the right tool for the job.
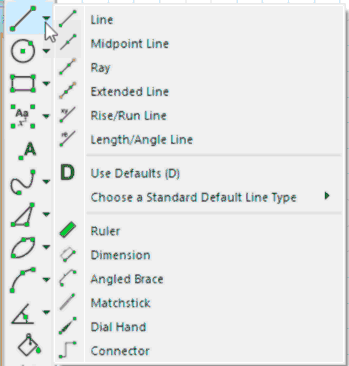
The first six buttons on this toolbar all produce lines. Once drawn, they all have the same options.
If you right click on an existing line you be able to access all of the lines properties - and there are lots.

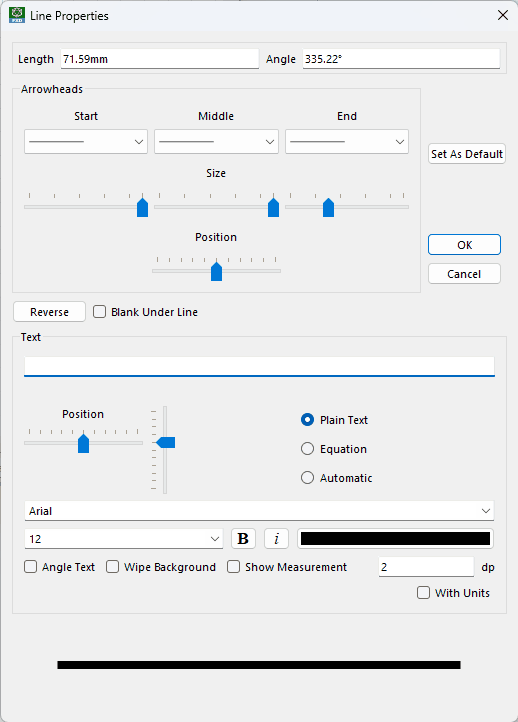
You have a choice of twenty-four arrow types for the start, middle and stop arrow. You can also set the size of the arrows, the position of the middle arrow. All of this is shown dynamically on the line at the base of the dialog box.
You can have FX Draw show the length of the line automatically (shown) with or without units. Alternatively you can attach text/equations to the line. You can angle the text. When set to Automatic, FX Draw will use AutoQuate technology to automatically detect equations. You can automatically draw a white, blank line under your line which allows you to clearly show that one line is above another.
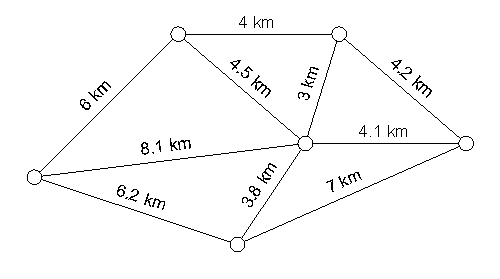
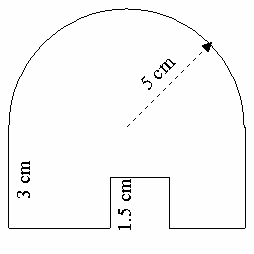
This can be used to good effect when drawing networks or to indicate measurements.
See Entering Equations on how to enter equations into FX Draw.
All lines have these options.
Available Parameters for Lines
$start - start point
$stop - stop point
$length
$angle
$mid - midpoint

Video - The Other Lines
Line Defined By End Points
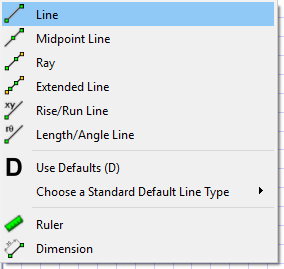
The simplest line. The line is defined by its end points.
Line Defined By Mid Point and End Point

This line is defined by starting on the midpoint of the line and then moving out to and end point. You might use it to draw the perpendicular bisector of another line for example.
Line Defined By Three Points (Ray)

The ray tool is mostly used during constructions. You would use it in situations where the line you are drawing is determined by a point that is NOT one of the end points.
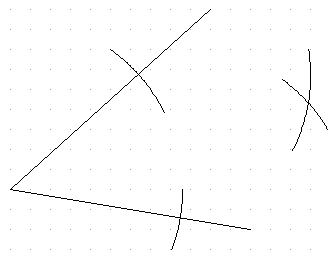
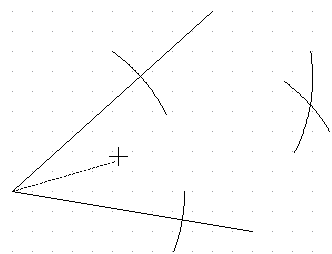
When drawing in the angle bisector, you are likely to want to extend the line past the intersection which is a little difficult with the standard line tools. This is a great time to use the ray tool.
The ray tool is easier to use than to describe. To begin with, you draw a line to the intersection. This defines the angle of the line.
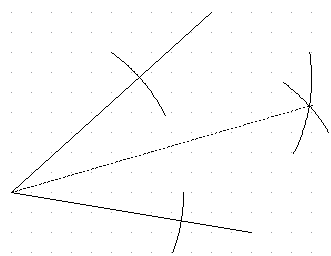
Now that you have defined the angle, if you move the mouse you should notice that the line changes length. It is always on the same angle - just the length has changed.
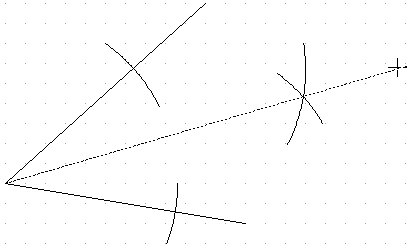
The line does not even need to be in the same direction.

Click again and your ray will appear.
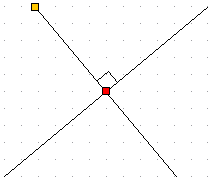
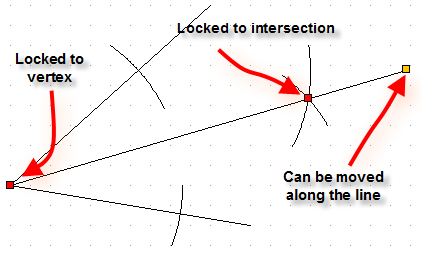
If we select the ray you will see three selection squares.
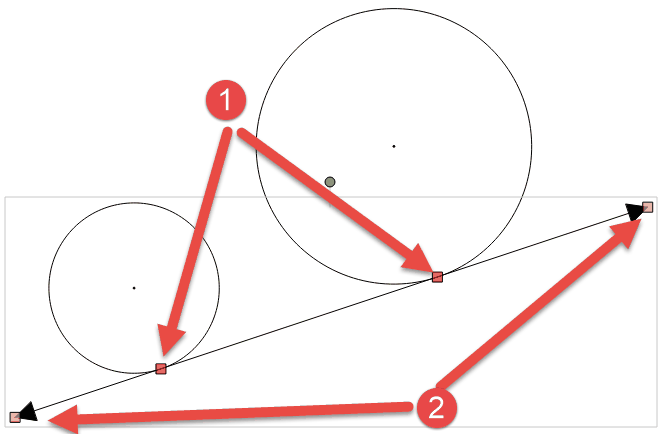
Line Defined By Four Points (Extended Line)

The extended line allows you to draw a line where the end points of the line are independent of the points defining the direction of a line. For example, if you wish to draw the cotangent of two circles but want the cotangent to extend beyond the circles.
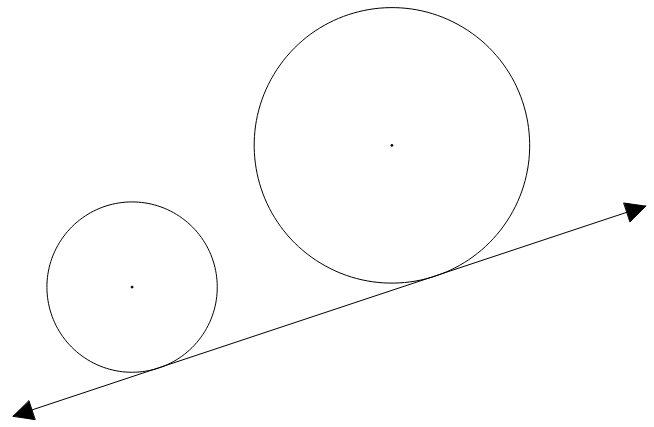
1. Select the tool,
2. Draw the line joining the two tangent points just as if you were using the simple "line defined by end points" tool. This process will determine the direction of the line - but we are not finished yet. Next we have to tell FX Draw where to stop and start the line.
3. Move the mouse to one end of the line you want to draw and click. Then move to the other end of the line and click.
The line will be created with four control points. The two red control points (1) are fixed to the cotangent points and define the direction of the line. The two amber control points (2) define the ends of the line. These control points are amber because they are locked onto the line defined by the first two points.
Line Defined By Start Point, Rise and Run
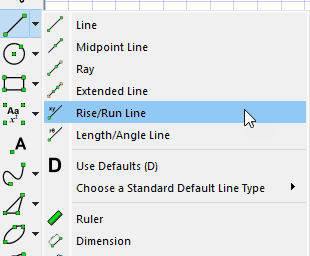
To use this tool, draw a line normally. Once you have released the mouse button, FX Draw will show this dialog box which will show the current rise and run, and allows you to set the exact rise and run you desire.
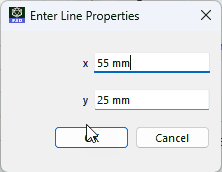
Enter the rise and run and FX Draw will automatically adjust the line.
Line Defined By Start Point, Length and Angle
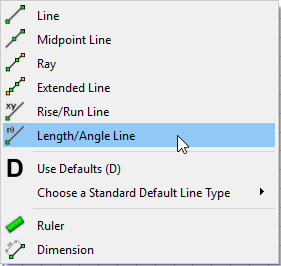
To use this tool, draw a line normally. Once you have released the mouse button, FX Draw will show this dialog box which will show the current length and angle, and allows you to set the exact length and angle you desire.
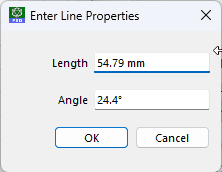
Enter the length and angle and FX Draw will automatically adjust the line.