FX Draw provides versatile and efficient angle marking tools. The two tools provided are "One Click" angle marking and "Two Click" angle marking. One click marking is highly efficient and flexible and will be the tool of choice in most situations. Two click marking is more tedious but can mark some angles that are not accessible using one click marking.
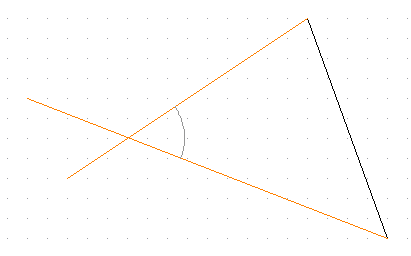
Angle Marks can be drawn between any two intersecting line segments. You can indicate the angle using points, arcs, the actual angle in degrees or radians, or you can add any text to the angle.
Importantly...
GAD MUST BE TURNED ON TO USE ANGLE MARKS!

Video - Marking Angles
FX Draw needs to detect the lines you are using for your angle so you must have GAD on to use this feature. If GAD is turned off, the angle marking tools will be greyed out.
One common misconception is that the angle tools will draw a complete angle including the two rays that define the angle. They will not. They will only add an angle mark to an EXISTING angle.
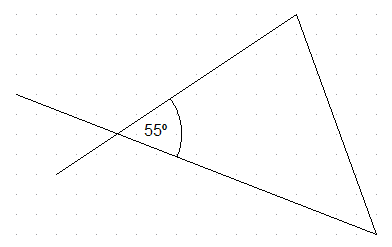
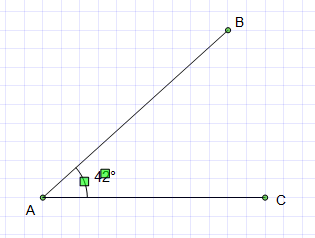
Depending on your current default setting, FX Draw will mark the angle with either a point, arc(s) or some text. The angles are dynamic – they will adjust themselves as you move the line segments – they will disappear if the line segments no longer cross and reappear if you later move them so that they cross again.
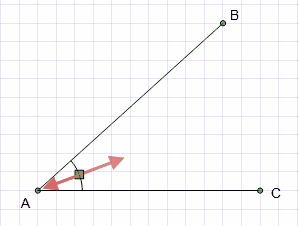
One Click Angle Marking
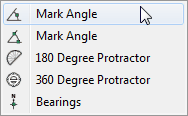
First, draw a diagram that includes some angles. Second, make sure that you have picked the one-click angle tool.
As you move your mouse pointer around, FX Draw will automatically sense close angles and show you where it would mark it.

One click and the angle will be marked using the current defaults.
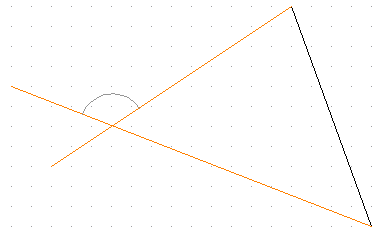
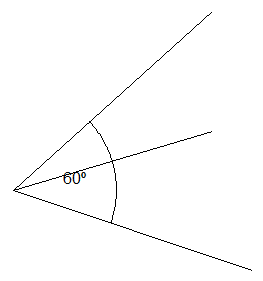
Two Click Angle Marking

Two click angle marking harks from FX Draw 2. It is a little tricky but allows you to mark some angles that One click marking misses - for example the 60 degree angle marked below.
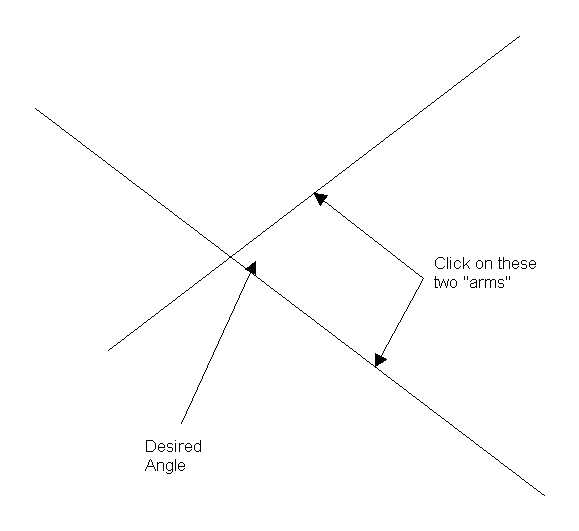
To draw a two click angle mark...
| • | Move the mouse to one of the "arms" of your angle. Wait until FX Draw has found the line and put a red dot on it. |
| • | Click AND HOLD the mouse button. |
| • | Move the mouse (while holding the button) to the other arm of the angle. |
| • | Release the mouse button when the OTHER arm is detected . |
You do not need to be too near to the intersection to draw an angle. Once FX Draw has detected your two lines, it will work back to the intersection automatically.
Angle Mark Size
Changing the size of an angle mark is easy. Click on an angle mark to select it. You will see a control point.
Moving this control point changes the size of the angle mark.
Some angle marks have two components (an arc and an angle for example). These components can be controlled individually.
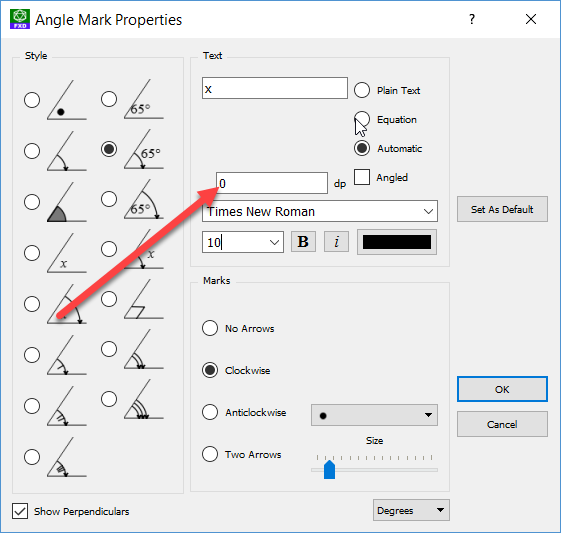
Angle Mark Options
Angle marks will initially be drawn using the current default settings. Right clicking on an angle mark will give you access to other angle options.
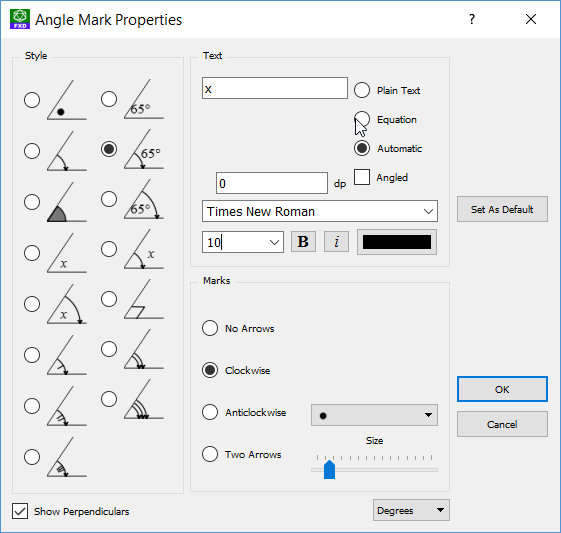
Most of the angle mark properties are self explanatory. The last style is useful for marking 90 degree angles in 3D diagrams. Notice that we have used FX Equation's standard ` character (next to the 1 button on your keyboard) to indicate degrees.
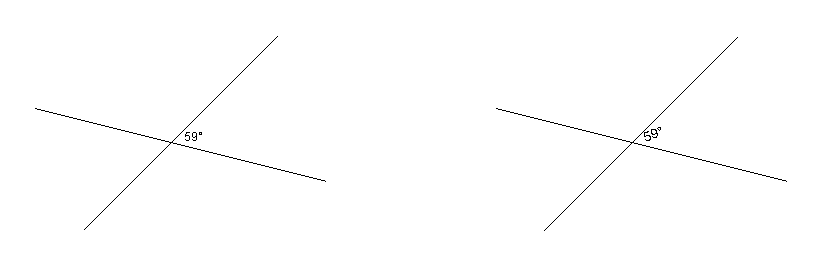
The "Angled" setting changes how an angle is written – either horizontally or angled along the bisector of the angle as shown above. Text formatted as an equation cannot be angled.
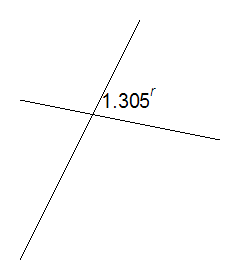
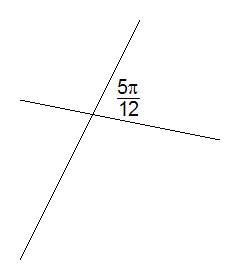
Marking Angles in Radians
If you have chosen to mark angles in radians, the style of the mark will depend on the number of decimal places you have selected.
Selecting 0 decimal places allows FX Draw to mark the angles in multiples of pi.
If you increase the number of decimal places, FX Draw will show the angle as decimal radians.