Show Grid Button

The show grid button determines whether FX Draw shows the background grid. It does not have any effect on whether FX Draw uses the grid. FX Draw automatically removes the background grid when some figures (a function graph for example) are drawn. This is to prevent confusion between the grid of graph and the background grid.
Isometric Grid Button

Pushing the Isometric Grid button has three effects:
1. The background grid is switched from Cartesian to isometric.
2. The size of the background grid is doubled (usually from 5 mm to 10mm)
3. GAD is turned off so that the background grid is dominant.
These three changes put FX Draw into a state that is ideal for drawing isometric diagrams.

Drawing Isometric Diagrams Video
Autopoint Button

FX Draw has the ability to automatically add points to geometric diagrams. The points are automatically generated as you draw geometric figures such as lines and circles. Obviously this is not always what is required. The Autopoint button controls this feature of FX Draw.
Autopoint On
Autopoint Off
Video - Autopoints
Line Type Toolbar
The line type toolbar lets you control the style, thickness and colour of lines that make up your image.

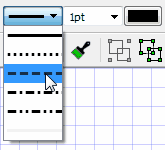
The first drop down menu lets you pick the style of line you wish to use. You can choose between solid, dotted, dashed and a mixture of dashes and dots.
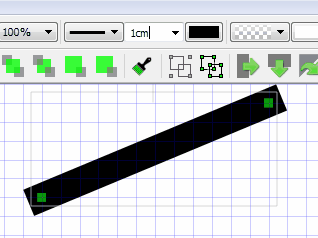
The second drop down menu allows you to set the thickness of the line drawn. The line tool uses points as its standard measurement. A point is one 72th of an inch.

You can enter ANY measurement in the line thickness using any of FX Draw's supported units (cm, mm, pt and ")
The final button allows you to choose the color of the line.
If a figure is selected, the line type toolbar will show the line settings for that figure and allows you to change them. If there are no figures selected then the line type toolbar will show the current default line settings that any NEW figure will be created with.
Setting Default Line And Fill Type Video
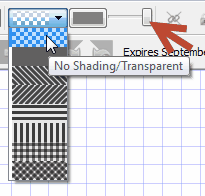
Fill Type Toolbar
You can change the type and colour of the fill used to draw a figure using the fill type toolbar. When you first draw a figure, it will be drawn using the currently selected fill type and colour. You can also change the fill type of the currently selected figure using the same toolbar. You have the choice of solid colour or six types of hatching. Note that the light grey/white checkerboard pattern is used to represent No Shading or Transparent.
You can select a figure's fill colour by pushing the colour button.
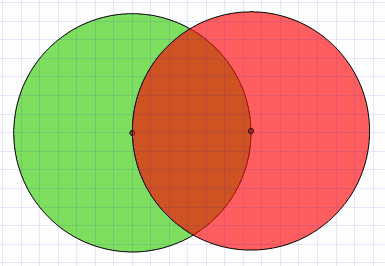
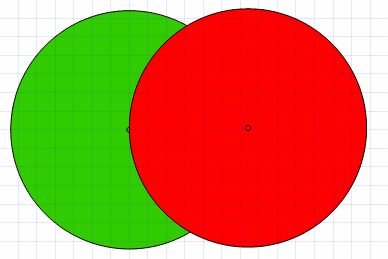
The transparency/opacity slider allows you to control the transparency of some shading - in particular shading of closed shapes such as circles, rectangles and polygons. The following diagrams show the effects of different transparencies - using the same colours each time.

GAD Level Toolbar
The GAD Level Toolbar allows you to control the Geometrically Aware Drawing calculations performed by FX Draw ranging from none up to full GAD regardless of the number of figures. Most of the time you will leave it set to the default level (shown).
No GAD |
FX Draw uses the mouse position for all actions |
|
Grid Only |
FX Draw draws everything to the underlying grid with no geometric analysis. |
|
Limited GAD (Default) |
FX Draw determines geometrically important points and relationships but as the number of figures increases, the range of things determined is reduced. For example, after there are more than 15 figures, FX Draw does not calculate points of intersection. This option allows for extensive use of GAD without the computational limit problems. |
|
"Infinite" GAD |
Sometimes you will want to use GAD regardless of the computational cost. With this option, FX Draw will calculate all geometrically important points and relationships regardless of the number of figures in the diagram |
|
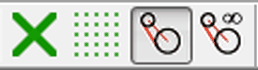
Break GAD Links Button
![]()
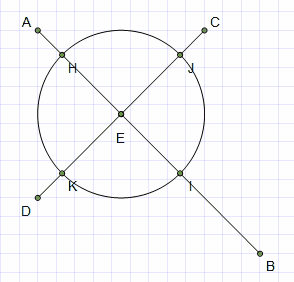
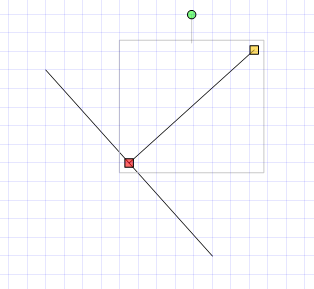
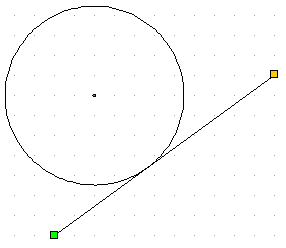
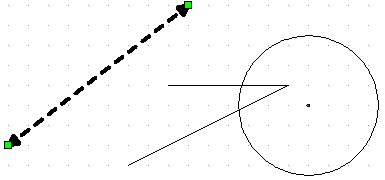
The second button breaks any GAD links for the selected figure - this means that it is no longer dependent on other figures. For example, in the diagram below, the selected line starts at the midpoint of the other line and is locked to the perpendicular. That is why its selection squares are red (locked to point) and amber (locked to a relationship).
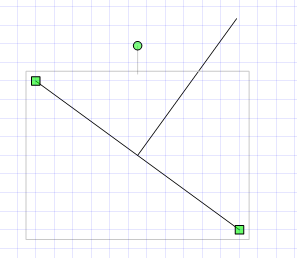
If I select and move the first line, the linked line will automatically moved to maintain its dependencies.
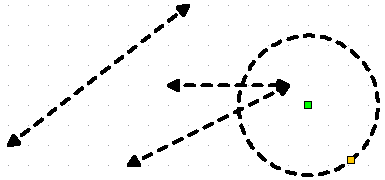
This behaviour is great but sometimes you will want the line to stay where it is. To do this, select the line and push the break links button.
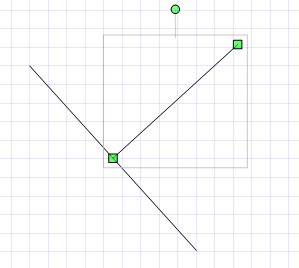
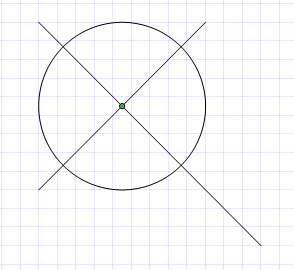
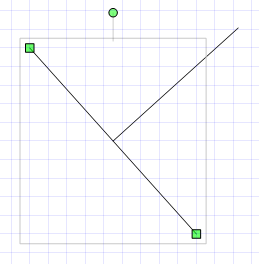
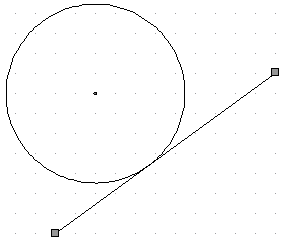
Note that the line's end points have turned green - they are now totally unlinked and moving the first line will not affect the selected line.
Video - Breaking Links and Locking Figures
Lock Button
![]()
The lock button lets you lock figures in place so that they cannot be moved accidentally.
If you have spent ages carefully placing a figure in exactly the right spot and want to make absolutely sure that you don't move it accidentally, you now have the option of locking it.
Draw your diagram and select any figures you want to lock.
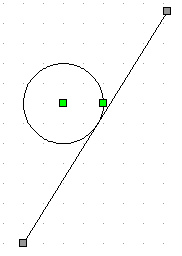
Now press the lock button ![]() and the figure will be locked in place. FX Draw will change the squares to grey to show you that they are locked.
and the figure will be locked in place. FX Draw will change the squares to grey to show you that they are locked.
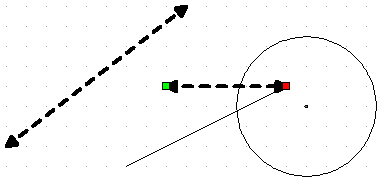
This line is now locked in place and you will not be able to move it at all apart from one important exception - it will still remember and use any GAD Links that were used. Even though you will not be able to directly move the line, it you change the circle, the line will remain tangential.
You can unlock any locked figures by selecting them and clicking on the lock button.
Layout Toolbar
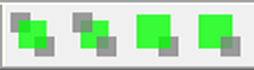
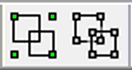
FX Draw draws the figures in the diagram in the same order you initially created them. If you have overlapping figures this means that one figure will be drawn over the top of the other. The layout toolbar allows you to change the drawing order of the figures so that different figures appear on "top of the pile". Each button represents the currently selected figure in green and shows what will happen when the button is pushed.
| • | Bring the currently selected figure to the front. |
| • | Send the currently selected figure to the back. |
| • | Move the currently selected figure one forward in the drawing order. |
| • | Move the currently selected figure one back in the drawing order. |
Video - Drawing Order
Format Painter Button
The format painter allows you to format one figure exactly as you want and then copy the formatting over to other figures. Format painting is available in a lot of products (such as Word) and ours works in exactly the same way.
To use the format painter, first format a figure and then select it as shown above.
When the SOURCE figure is selected, press the format painter button

Then click on a DESTINATION figure that you would like the formatting copied on to.
To format more figures, keep clicking the format painter button and the next figure.
The format painter will always copy the line style, line thickness, line colour, fill style and fill colour. The more similar the source and destination figures, the more information is painted across.
Grouping Toolbar
Allows you to group the currently selected figures or ungroup the currently selected group. A group is just a collection of figures that is treated as one.
Reflection Toolbar
Allows you to reflect the currently selected figures.

Scale Toolbar
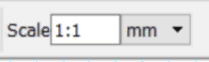
Allows you to manage the global scale settings. FX Draw will use these settings for all calculated dimensions.
Parameters Toolbar
Allows you to access and control Efofex parameters which allow you to create self-modifying diagrams.