There are two ways of inserting an editable Efofex graphic into any container/document.

This is usually the quickest way of inserting a graphic into your work. Draw your graphic, press the green check mark button, and then paste your graphic into your work. The only decision is whether to have an SVG version of your graphic available on the clipboard, but we will discuss this later on.

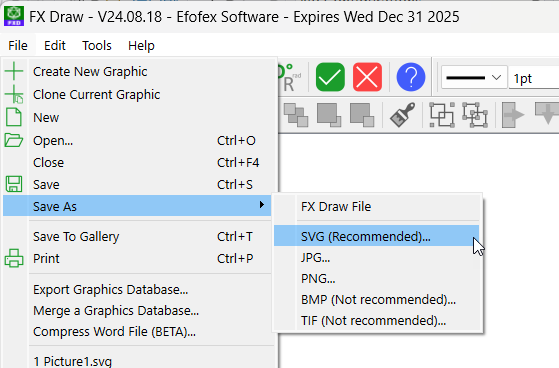
This approach allows you to save a copy of your image separate to your work. Once you have drawn your image, choose File, Save As from the toolbar and select your desired output.

We recommend saving as an SVG graphic if possible. If you must use a bitmap output, we recommend PNG files.
In general, we recommend that you use SVG files if you can. There are two major benefits to SVG files:
SVG output does have some disadvantages:
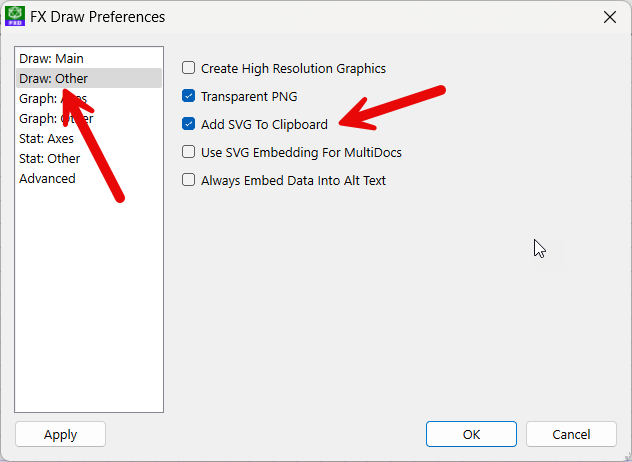
When using the Green Check mark method of outputting graphics, you will need to ensure that your product is set up to add an SVG version to the clipboard. To do this, go to your Tools menu and select Preferences (select Preferences from the main menu on a Mac). Ensure that Add SVG to the Clipboard is checked.

Keep up to date with changes by subscribing.